Ultrasonic Testing ( UT) :
Principle : According to some basic characteristics of ultrasonic waves when propagating in materials, reflection, transmission, refraction and waveform conversion will occur when propagating to heterogeneous interfaces, and ultrasonic waves will be attenuated when propagating in materials; and the ultrasonic waves after these changes occur It is received by the inspection equipment and displayed in an appropriate manner. The characteristics of the received ultrasonic signal are analyzed and the defects existing in the material itself and its interior can be evaluated according to the inspection results and the characteristics of the workpiece.
Scope of application :
( 1) Applicable to the detection of various metallic materials and some non-metallic materials; ( 2) Applicable to the inspection of machined parts, forgings, castings, welded parts, and composite components. ( 3) It can be applied to the detection of plates, bars and pipes.
Advantages :
( 1) Strong penetrating power, which can detect not only thinner materials, but also materials within a larger thickness range. ( 2) High sensitivity. ( 3) The position of the defect can be measured more accurately. ( 4) The equipment is light and harmless to the human body and the environment.
Limitations :
( 1) It is easy to miss the defects located on the surface and near the surface. ( 2) Whether the shape of the specimen is regular, the size of the surface roughness, the radius of curvature, etc. have a great influence on the reliability of ultrasonic testing. ( 3) The internal structure, grain size, composition phase, uniformity and compactness of the material will affect the sensitivity and signal-to-noise ratio of ultrasonic detection. ( 4) The operator's human factors have a greater impact on the test results.
Radiographic Inspection ( RT) :
Principle : Rays interact with matter in the process of penetrating matter, weakening its intensity due to absorption and scattering. The degree of intensity attenuation depends on the attenuation coefficient of the material and the thickness traversed in the material. If there is a defect in the part of the transilluminated object (specimen), and the attenuation coefficient of the material constituting the defect is different from that of the specimen, the intensity of the transmitted ray in this local area will be different from the surrounding area. This difference in ray intensity is detected, and the film is placed in an appropriate position to make it photosensitive under the action of the transmitted ray, and the negative film is obtained after processing in the dark room. The degree of blackening of each point on the film depends on the amount of radiation exposure. Due to the difference in the transmitted ray intensity between the defective part and the intact part, the blackness difference will appear in the corresponding part of the film. Put the negative film on the viewing lamp to observe, you can see the images of different shapes composed of different blackness areas, and the film reviewers judge the defects and evaluate the quality of the test piece accordingly.
Scope of application : It is suitable for the detection of various metals, non-metallic materials and composite materials; the most widely used in welding parts and castings.
Advantages :
( 1) An intuitive image of the defect can be obtained, which is qualitatively accurate, and the quantification of the length and width dimensions is also relatively accurate. ( 2) The test results are directly recorded and can be stored for a long time. ( 3) The detection rate of volumetric defects (porosity, slag inclusion, etc.) is high
Limitations :
( 1) It is suitable for inspecting thin workpieces but not thicker ones. ( 2) For area-type defects (such as cracks, lack of fusion, etc.), if the camera angle is improper, it is easy to miss the inspection. ( 3) It is difficult to determine the position and size (height) of the defect in the thickness direction of the workpiece. ( 4) The detection cost is high and the speed is slow. ( 5) The rays are harmful to the human body.
Magnetic Particle Testing ( MT) :
Principle : Under the action of an appropriate external magnetic field, the ferromagnetic material workpiece is magnetized to generate a magnetic induction magnetic field. When there is discontinuity on the surface or near the surface of the workpiece, the magnetic induction line of the induced magnetic field will be locally distorted and a leakage magnetic field will be generated. Magnetic powder on the surface of the workpiece, under suitable lighting conditions, forms visually visible magnetic marks, thereby indicating the location, size, shape and severity of the discontinuity.
Scope of application :
( 1) It is suitable for the small size of the surface and near surface of the ferromagnetic material workpiece. Detection of extremely narrow gaps and defects that are difficult to see visually. ( 2) Applicable to the inspection of unprocessed raw materials and processed semi-finished products, finished parts, and in-service and used workpieces and products. ( 3) It is suitable for the detection of various components such as pipes, bars, plates, profiles and steel forgings, steel castings and welding parts.
Advantages :
( 1) Defects on the surface and near-surface (opening and non-opening) of ferromagnetic materials can be detected. ( 2) The location, shape, size and severity of defects can be displayed intuitively. ( 3) It has high detection sensitivity. Detects micron-wide defects. ( 4) The detection speed is fast, the process is simple, the cost is low, and the pollution is light. ( 5) It is hardly affected by the size and geometry of the workpiece. ( 6) The repeatability of detecting defects is good. ( 7) When the coating of the workpiece is thin, the detection can be carried out without removing the coating. ( 8) Defects such as cracks, white spots, hair lines, folds, looseness, cold insulation, pores and slag inclusions can be detected.
Limitations :
( 1) Only workpieces made of ferromagnetic materials can be detected. ( 2) When the channel method and the contact method are used for magnetization, it is easy to produce arcs to burn the workpiece. Non-conductive coatings on electrical contacts must be ground off.


Penetration Testing ( PT) :
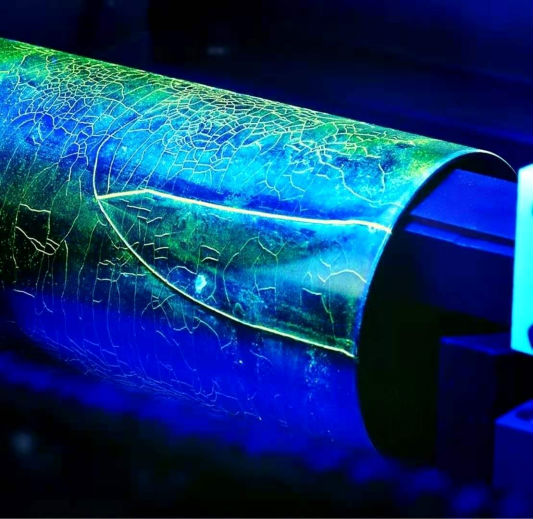
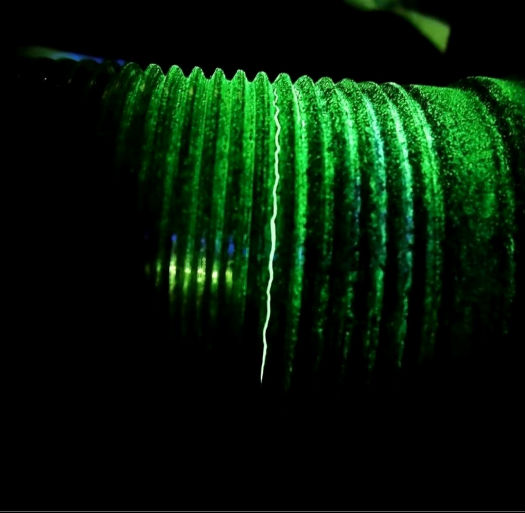
Principle : After the surface of the workpiece is coated with a penetrant containing fluorescent dyes or coloring dyes, under the action of capillary, after a certain period of time, the penetrant can penetrate into the defects of the surface opening, remove the excess penetrant on the surface of the workpiece, and after drying , and then apply the adsorption medium -developer on the surface of the workpiece. Also under the action of capillary, the developer will attract the penetrant in the defect, and the penetrant will seep back into the developer. Under a certain light source (black light or White light), traces of penetrant at the defect are displayed (yellow-green fluorescence or vivid red).
Scope of application :
( 1) It is suitable for the detection of defects with small openings on the surface of any non-porous material, extremely narrow gaps and difficult to find visually. ( 2) It is suitable for the detection of workpieces and products of various shapes, in production or in service. ( 3) It is suitable for the detection of various components such as pipes, bars, plates, profiles and steel forgings, steel castings and welding parts.
Advantages :
( 1) Defects such as cracks, white spots, hairlines, folds, looseness, cold insulation, pores and slag inclusions on the surface of the workpiece can be detected. ( 2) It can detect the surface opening defects of metal materials and non-metal material workpieces. It is not limited by the chemical composition of the workpiece to be inspected. ( 3) The position, shape, size and severity of defects can be displayed intuitively. ( 4) No equipment, no water and electricity, especially suitable for on-site testing. ( 5) It is not limited by the structure of the workpiece. ( 6) Not limited by the shape, size and direction of defects. All defects open to the surface can be detected simultaneously in a single inspection.
Limitations :
( 1) Porous materials cannot be detected. ( 2) Non-surface openings or defects that are blocked due to external factors cannot be detected. ( 3) The repeatability of detecting defects is poor. ( 4) It will cause certain pollution to the testing site.
Our company currently has a professional team of senior engineers and engineers. The main inspectors are composed of a team of engineers who have been engaged in non-destructive testing for many years, with strong technical ability and rich experience. All inspectors have professional inspection qualifications, including non-destructive testing (ASNT/ISO9712 II/III and national special equipment non-destructive testing qualification II/III), American Association for Materials Performance and Protection (AMPP-Coatings Inspector/Senior Coatings Inspector), welding inspection (CWI, SCWI), International Welding Engineer IWE, API 653, API 510, API 570, API 571, API Quality Engineer, Senior Mechanical Engineer, etc.
The following inspection services can be provided for enterprises:
Penetrant Testing (PT), Magnetic Particle Testing (MT), Ultrasonic Testing (UT), Phased Array (PAUT), Time-of-Flight Diffraction TOFD, Radiographic Testing (RT), Visual Testing (VT), Eddy Current Testing (ECT), Leak Testing (LT), Magnetic Leakage Detection (MFL), Acoustic Emission Detection (AE), Digital Imaging (DR), Real-time Imaging Detection (CR), Alternating Current Field Measurement(ACFM), etc.